
Setup for AudioCodes MP-114, firmware version 6.20A
1. To enter AudioCodes web interface you should connect your PC to Ethernet, and change the PC's network card settings (under "network settings"). By default, the network interface of MP-114 has the address 10.1.10.10, mask 255.255.0.0, so set static IP address 10.1.10.1 subnet mask 255.255.0.0. In browser, enter 10.1.10.10 and view page with login and password form. Default login/password are Admin/Admin. It is necessary to assign a static IP address from our subnet to thegateway. The next step is to set up VoIP-Network-IP Settings. Fill these fields as shown below.
In this example, the subnet 192.168.0.0/24 is used
192.168.0.2: IP-address of our AudioCodes gateway
255.255.255.0: subnet mask
192.168.0.1: IP-address of gateway by default, address of router/modem
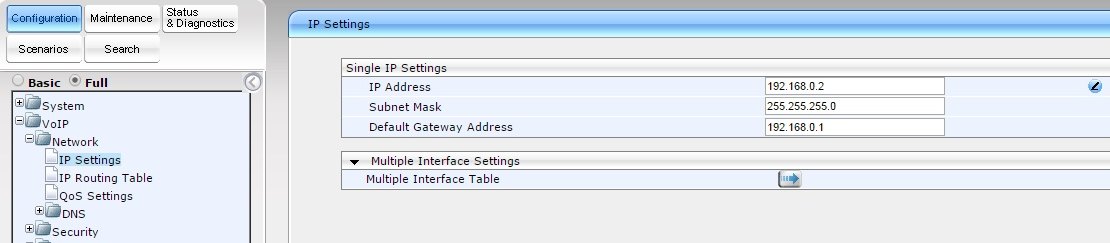
Click "Submit" and wait until hardware applies these settings.
Disconnect gateway from PC, connect to network. Change network card settings, enable DHCP or set up network interface with a static IP address from subnet 192.168.0.0/24 (for example 192.168.0.9). In the browser's URL bar enter AudioCodes' IP-address (192.168.0.2). Under "Hardware Settings", click "Burn!" Skipping this step will entail that after reset, hardware will return to its default settings.
2. Set gateway as per end point. On the left, click on “Full”, under the tab "Configuration" – "VoIP" – "SIP Definitions" – "Proxy & Registration".
Here enter the following data:
Enable Registration: Enable – enable registration
Primary SIP Server: enter IP address of voip.syd.spintel.net.au (for example 203.29.125.70)
Subscription Mode/ Registration Mode: per endpoint: each port of gateway is registering separately.

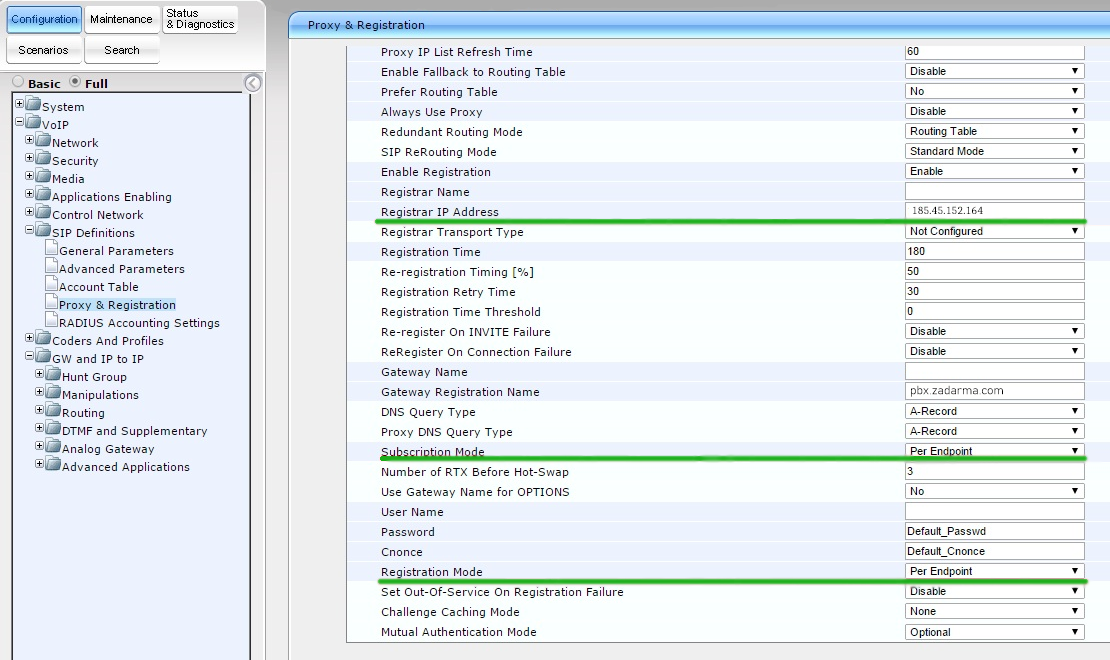
Click "Submit"
3. Under the tab "Configuration" – "VoIP" – "SIP Definitions" – "General Parameters" change the following parameters, according to your need:
NAT IP Address: – if your hardware is behind NAT, then specify your external IP address
Fax Signaling Method: choose method of fax sending
SIP UDP Local Port: 5060
SIP Destination Port: 5060
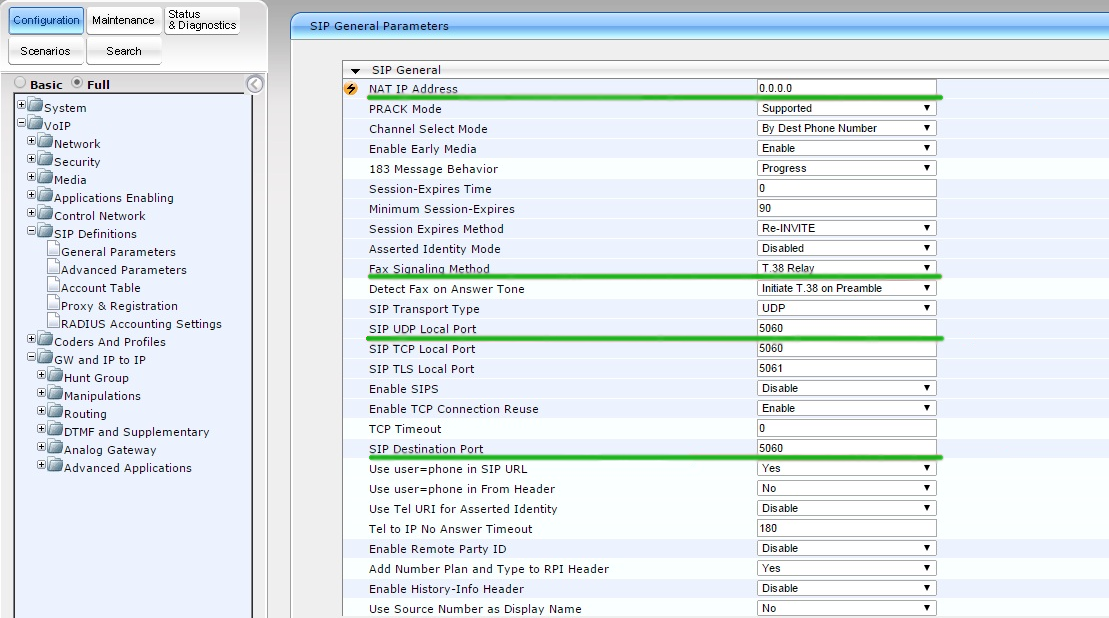
Click "Submit"
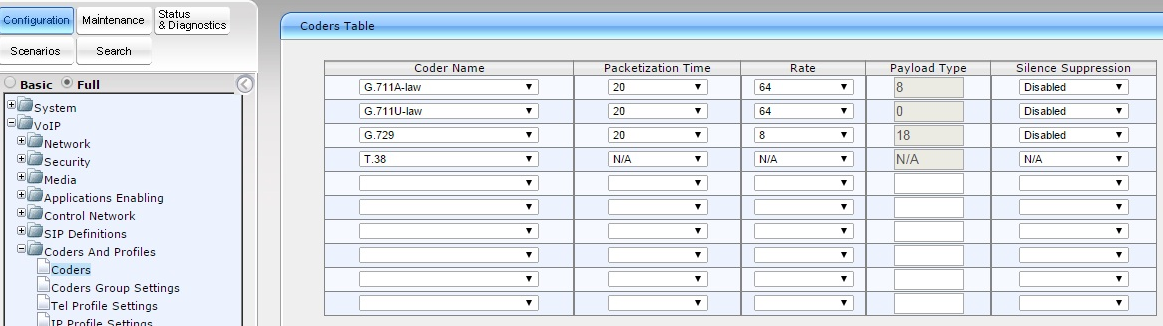
4. Codecs settings. VoIP – Coders and Profiles – Codes. Choose and set priority of codecs and click Submit
5. Now make groups for ports. Open VoIP – GW and IP to IP – Hunt Group Setting, Set ID Hunt Group, Channel mode – strategy by which lines will be chosen and in our case Registration mode – per endpoint
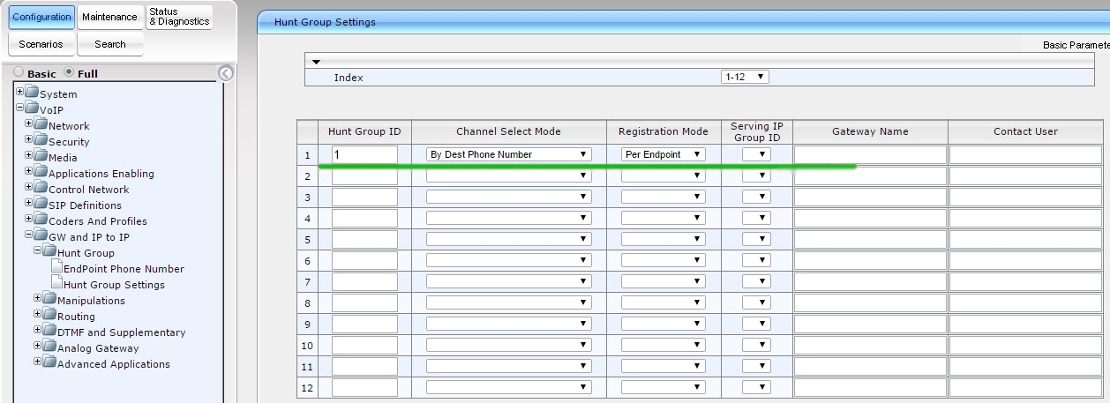
Click "Submit"
In this section open tab Endpoint Phone Number and set on Hunt a group of number.
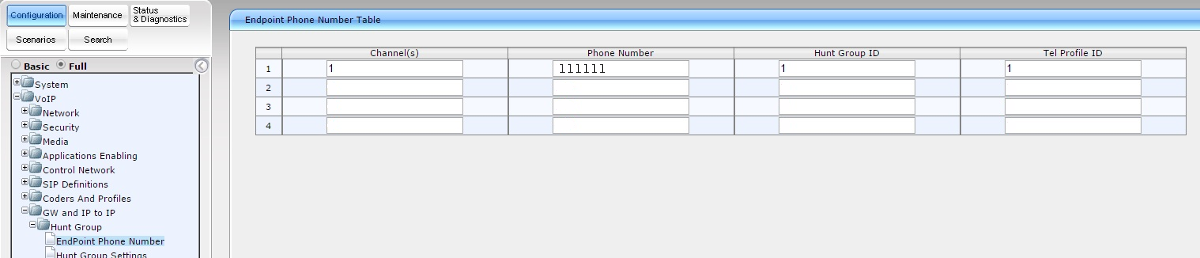
Click "Submit"
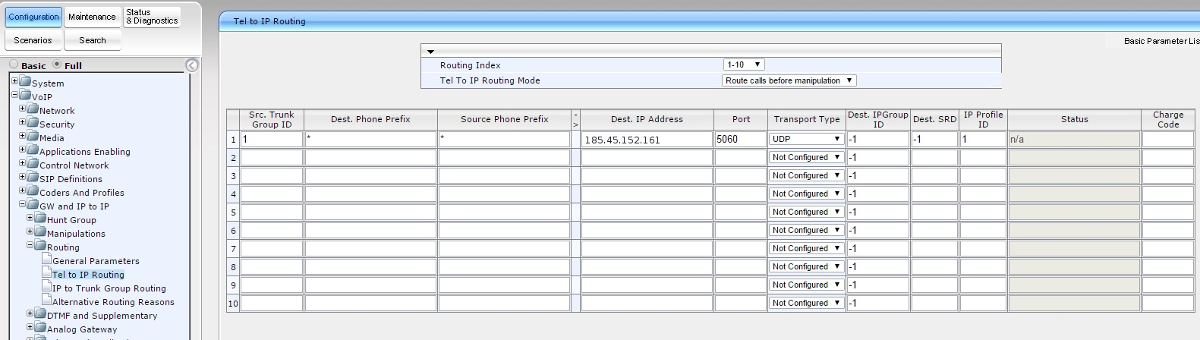
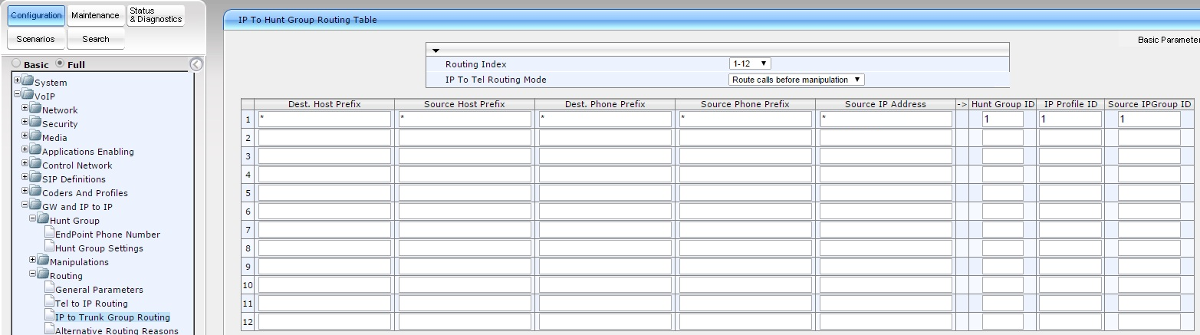
6. Set routes for calls from IP on analog ports and vice versa. VoIP GW and IP to IP – Routing – Tel to IP Routing/IP to Trunk Group Routing
Src Trunk Group ID: 1
Dest Phone Prefix: *
Source Phone Prefix: *
Dest IP Address: IP address of server: voip.syd.spintel.net.au (for example 203.29.125.70)
Port: 5060
Transport Type: UDP
Dest. IP Group ID : -1
Dest. SRD: -1
IP Profile ID: 1

Dest Host Prefix: *
Source Host Prefix: *
Dest Phone Prefix: *
Source Phone Prefix: *
Source IP Address: *
Hunt IP Group ID: 1
IP Profile ID: 1
Source IPGroup ID: 1
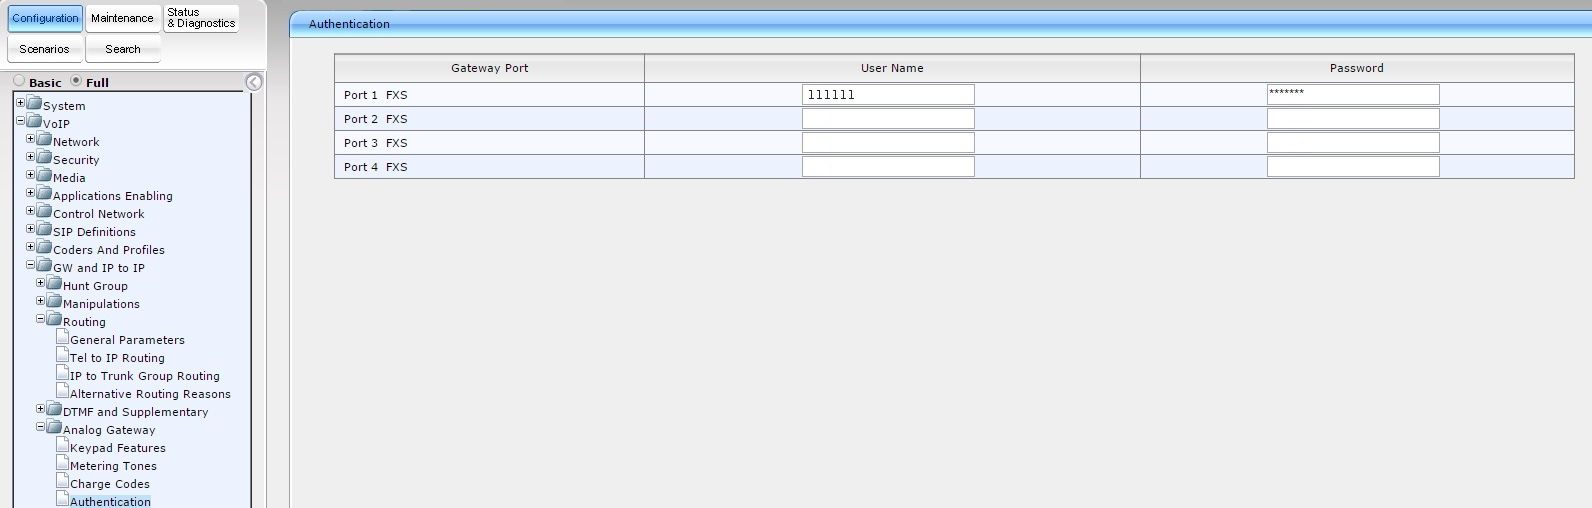
7. Set authorization. VoIP – GW and IP to IP – Analog Gateway – Authentication
Enable Registration: Enable – enable registration
NAT IP Address: Your internal VoIP number (for example xxxxxxx)
Fax Signaling Method: Your password of VoIP

After this step, save settings and “burn” them into the device's memory. To save settings click "Submit". In the next window that appears click on "OK" to “burn” data into device's memory - click on “Burn”.

In the following window that appears, click on "OK". Now, even if the device is rebooted, settings will remain the same and there will be no need to reset the device.